docs
Netpump Service App Registration Configuration Guide
This guide will show you how to setup the app registration for a Netpump Server cluster through Azure portal.
Each cluster of Netpump Servers uses a single app registration. All Netpump Servers in the cluster can communicate with each other. All users assigned to the app registration can use the Netpump Servers.
Audience
The user of this guide should have basic or moderate knowledge of how to use Azure Portal, and Microsoft Entra ID.
Steps
Create new App Registration
- Goto
https://portal.azure.comand login -
Search for
Microsoft Entra IDand click on it.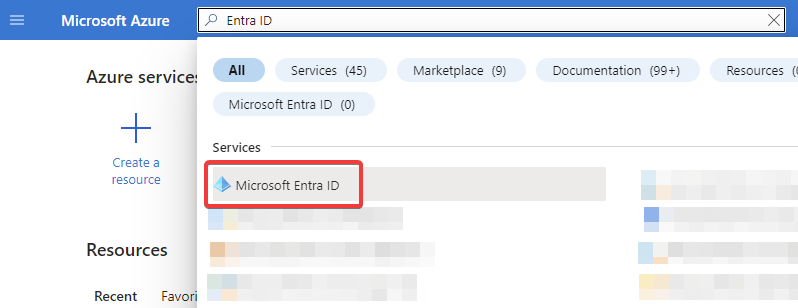
-
Click
Addthen selectApp Registration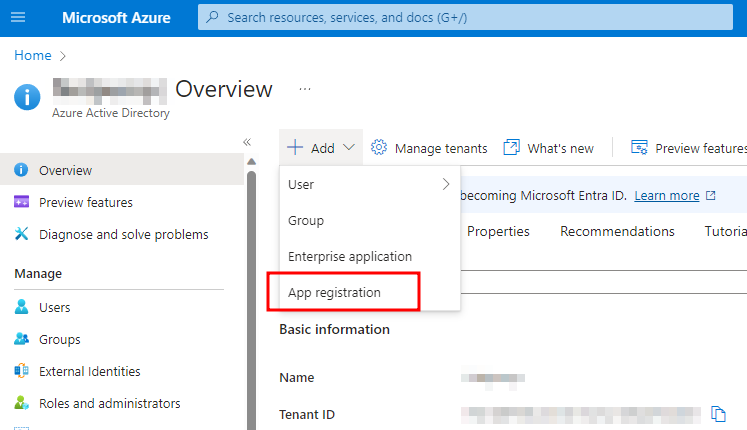
-
Type in a name for the app e.g.
Netpump Server -
Select
Accounts in this organizational directory only - Click
Register
Set up API requirements for the App Registration
Setup the Application ID URI
-
Click
Expose an Api
-
Click
Addnext to theApplication ID URI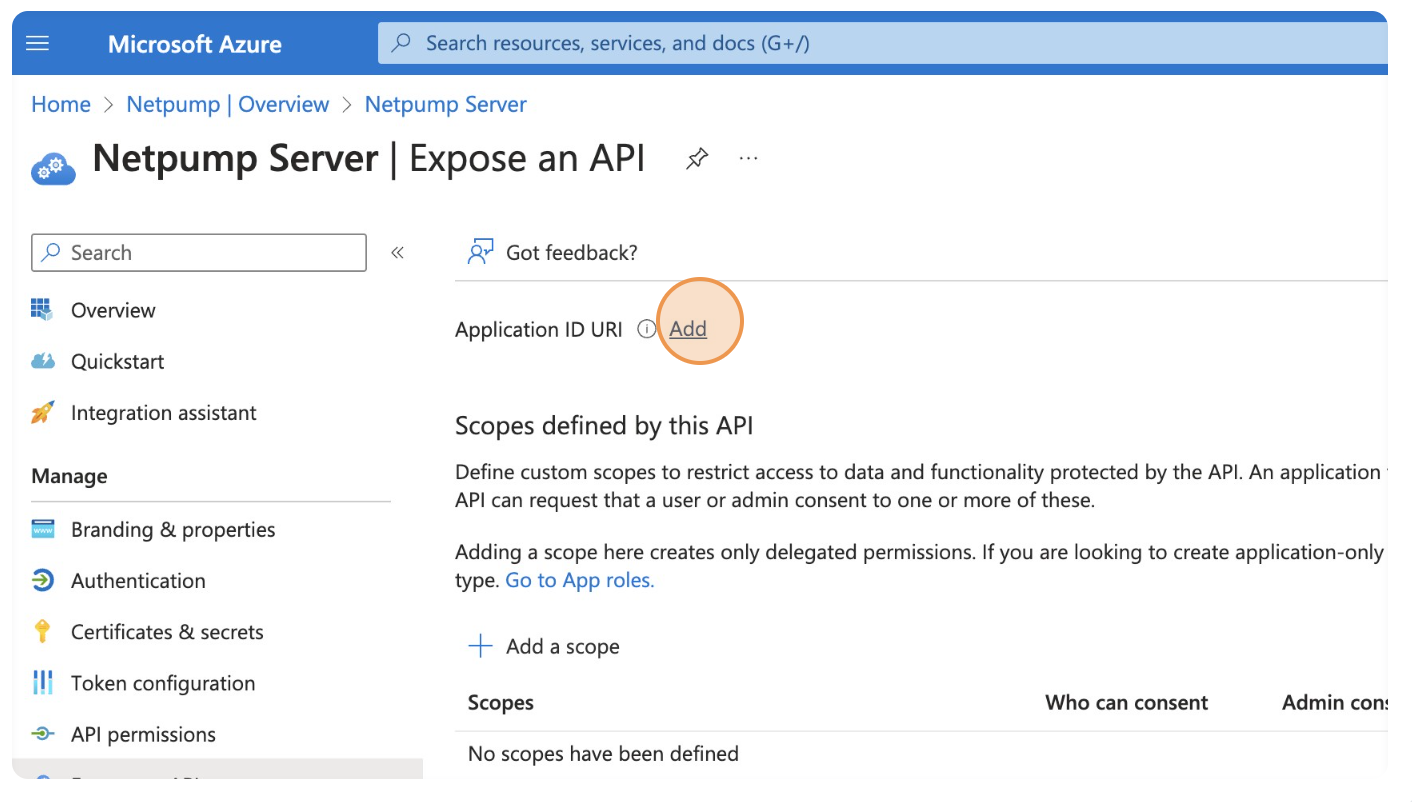
-
Click
Save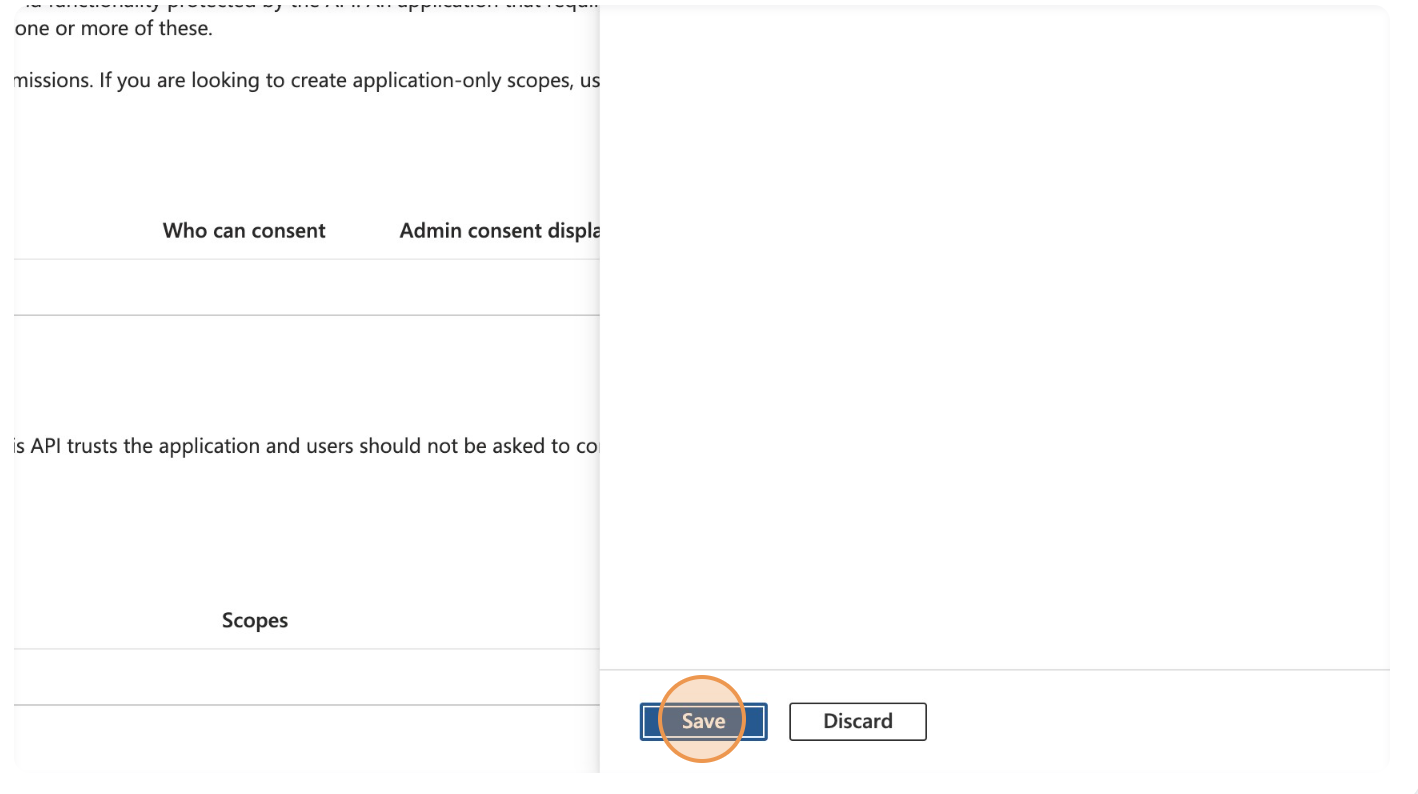
ℹ️ Note: Whether you use a default value or a specific value is based on individual company policy, it has no impact on Netpump.
Create scope Transfers.All
-
Click
Add a Scope
- Fill in the form in with the below values
ℹ️ Note: Only
Scope Nameis required to match the below value, the consent display names and descriptions can be adjusted to suit company requirements and policy.Scope name* Transfers.All Who can consent? Admin and users Admin consent display name Allows all Transfer Operations Admin consent description Allows a user to handle all operation in relations Transfers User consent display name Transfer Admin User consent description Allows a user to handle all operation in relations Transfers 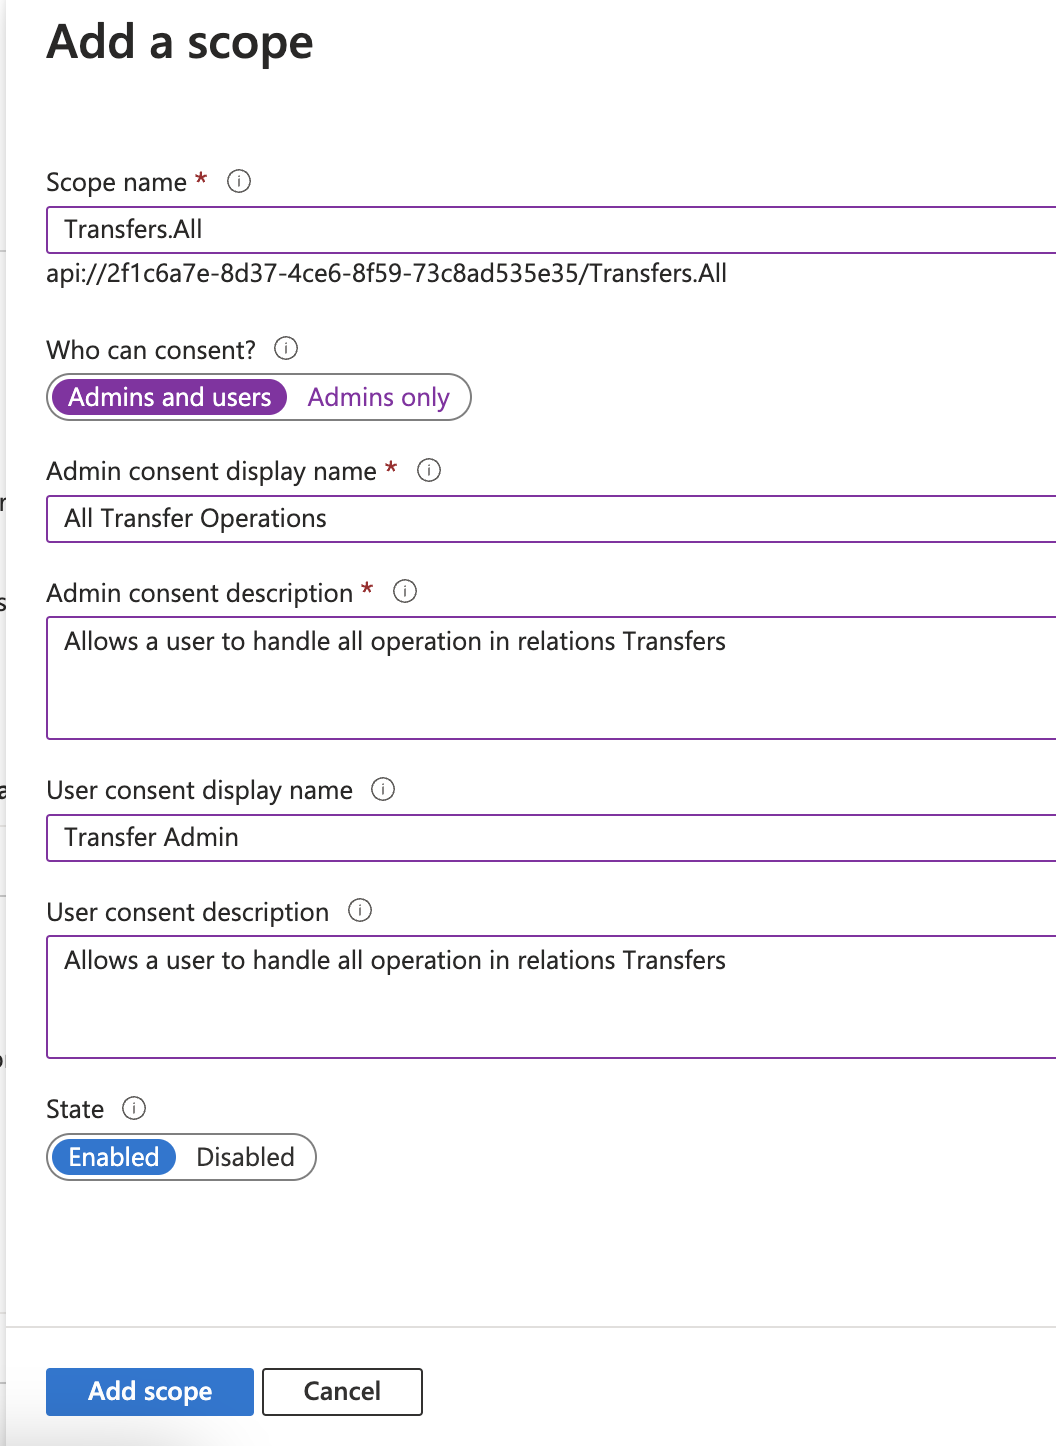
- Click
Add Scope
Add authorized client applications
-
Click
Add a client application
-
Add the client ID
d99b6435-bf29-4655-a1a2-ed1dbad109b3ℹ️ Note: This guid is for the global Netpump Desktop Application
- Tick boxes for
Transfers.Allℹ️ Note: The prefix will change depending on the Application ID URI
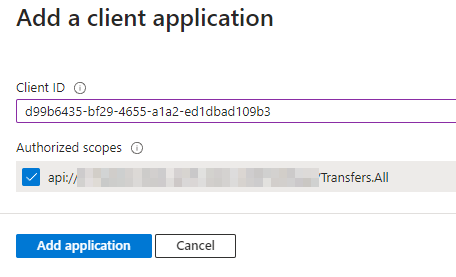
- Click
Add application
Create an App Role
-
Click
App roles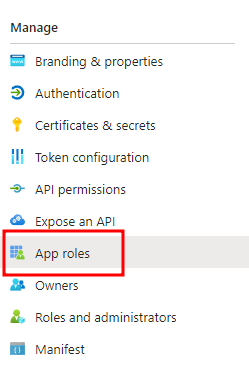
-
Click
Create App Role -
Enter the details as follows:
Display name Automation Allowed member types Applications Value Automation Description Server to server and script access 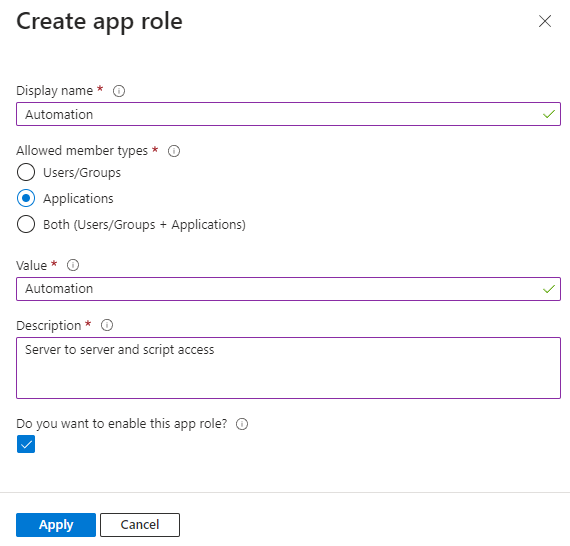
-
Click
Apply
Setup permissions
-
Click
API permissions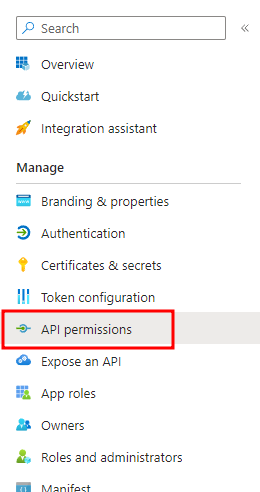
-
Click
Add permission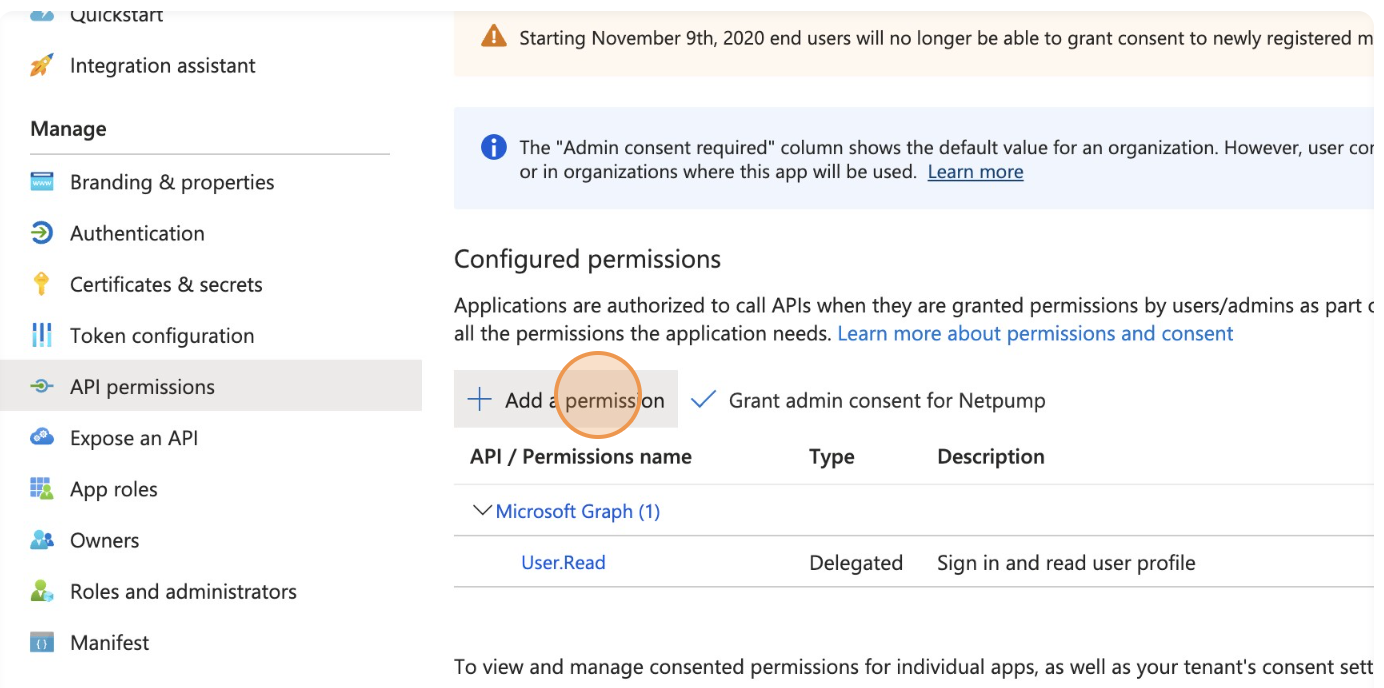
-
Click
APIs my Organization Uses - Search for
Netpump Serverℹ️ Note: The name will depend what name you gave the application in the
App Registration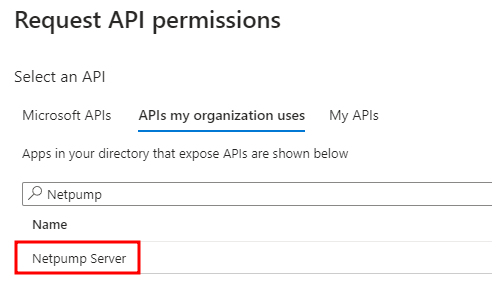
-
At the “What type of permission?” question, choose
Delegated, and add theTransfers.Allpermission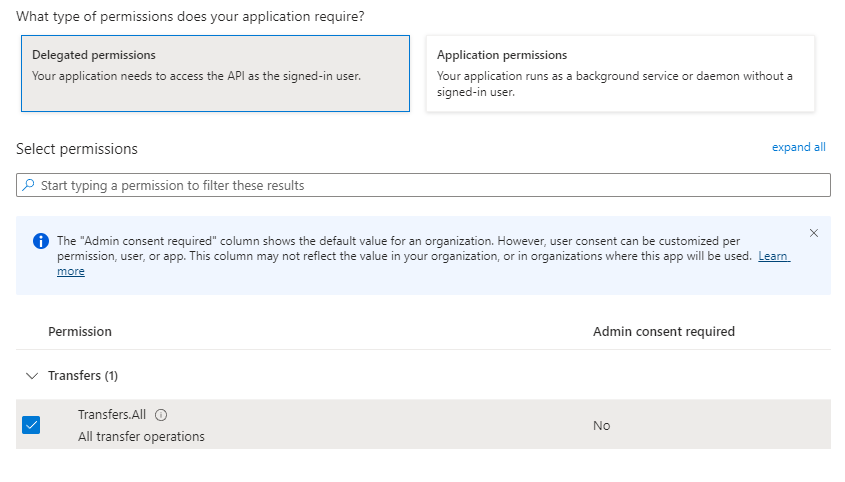
-
Click
Add permissionsto save this permission. -
Click
Add permissiona second time - Search for
Netpump Serveragainℹ️ Note: The name will depend what name you gave the application in the
App Registration -
At the “What type of permission?” question, this time choose
Application, and add theAutomationpermission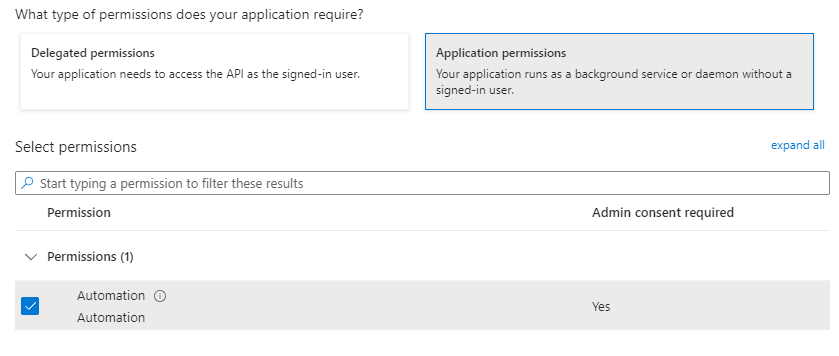
- Click
Add permissionsto save this permission.
Create the Client Secret
-
Click
Certificates & secrets
-
Click
New client secret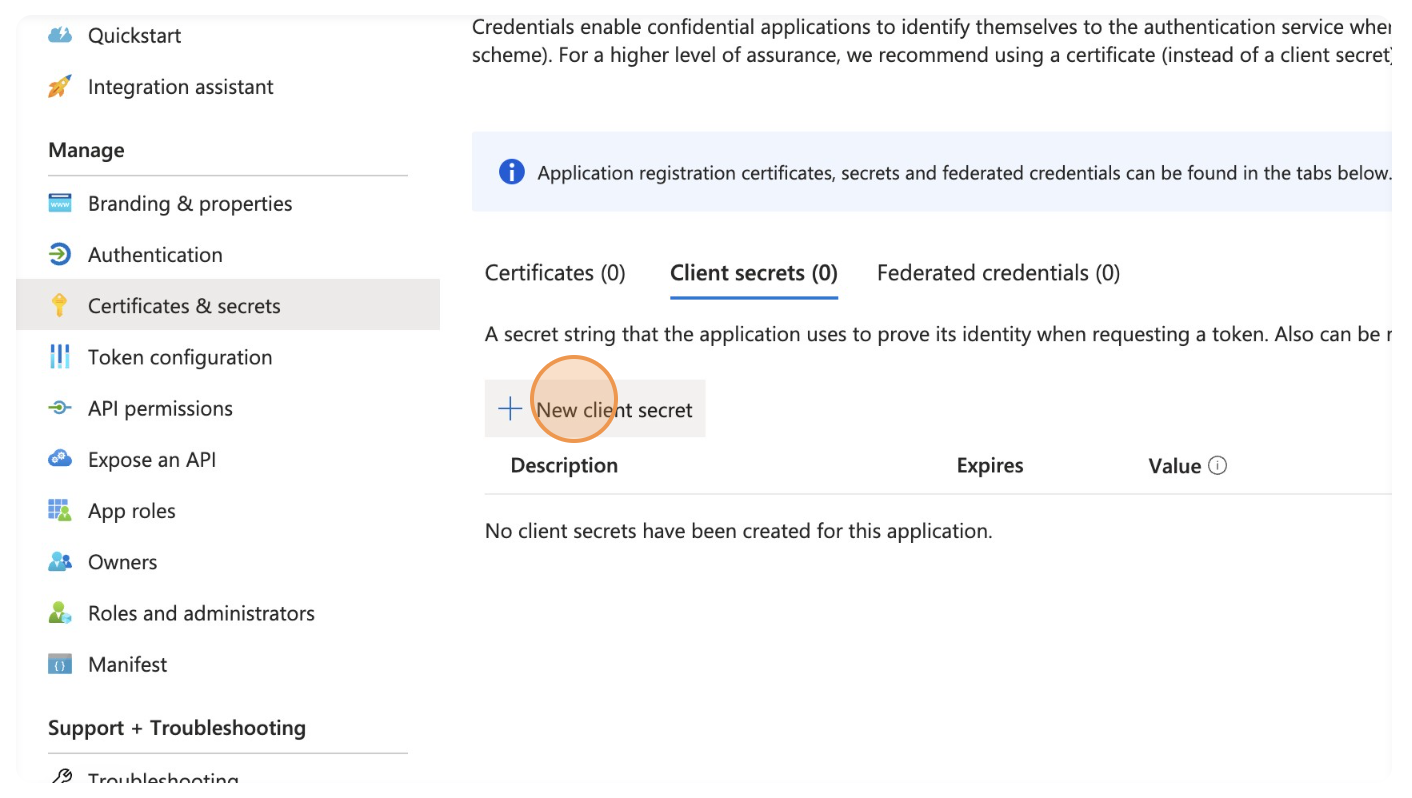
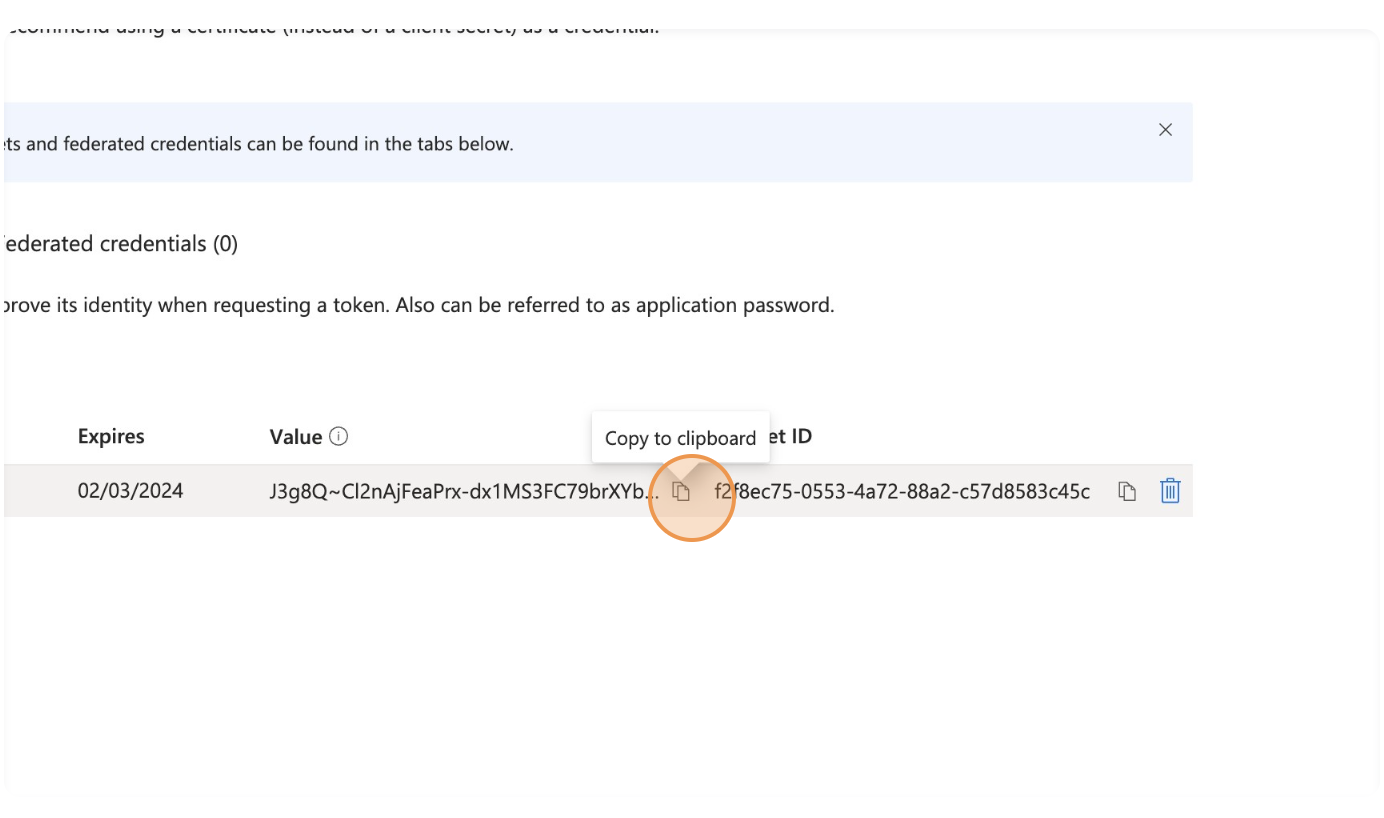
- Enter a description for this secret, select the desired expiry (per company requirements) and click
Addℹ️ Note: This secret will be used for the authentication settings when provisioning Netpump servers.
- Copy the client secret and save it for Netpump server provisioning later
ℹ️ Note: You can not view this secret after you leave this page.
Edit the manifest
-
Click
Manifestin the menu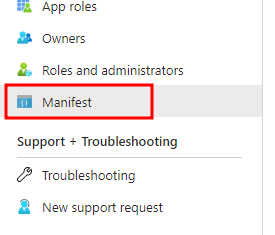
-
Edit the manifest to set
accessTokenAcceptedVersionto the value2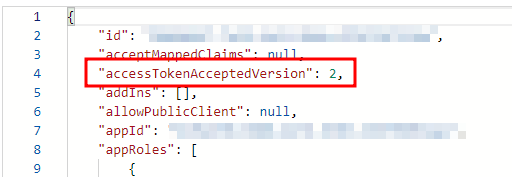
-
Click
Save
Configure Redirect URLs and Token Authentication for Configuration Page
For an administrator to access the Configuration Page, allowed URLs must be added to the application. The URLs should match the DNS record that will be used to access the Netpump Service Configuration Page.
-
Click
Authenticationin the menu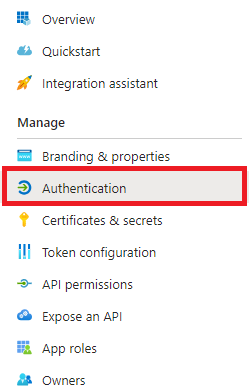
-
Click
+ Add a Platform.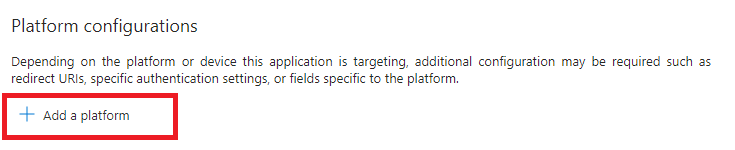
-
Select
Webfrom the Platform listing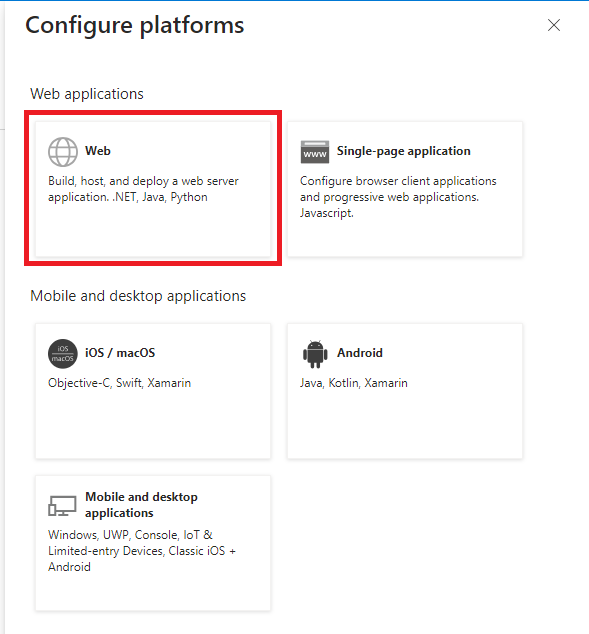
-
Enter a valid
Redirect URIsthat corresponds to the public DNS. Multiple URIs can be added after saving the initial entry. SelectID tokens (used for implicit and hybrid flows)from the options.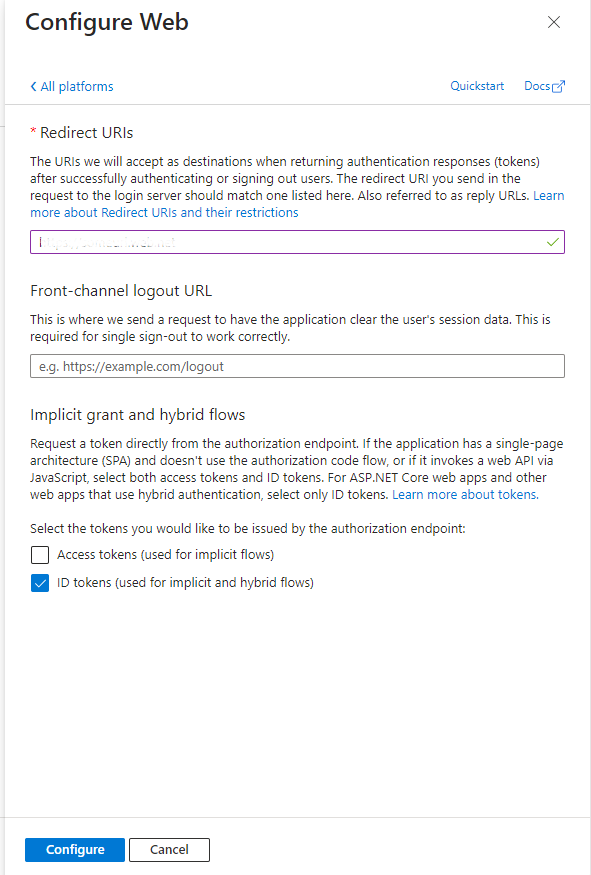
-
Click
Configure
Assign users
-
Click
Overviewin the menu -
Click on the link next to the
Managed application in local directorylabel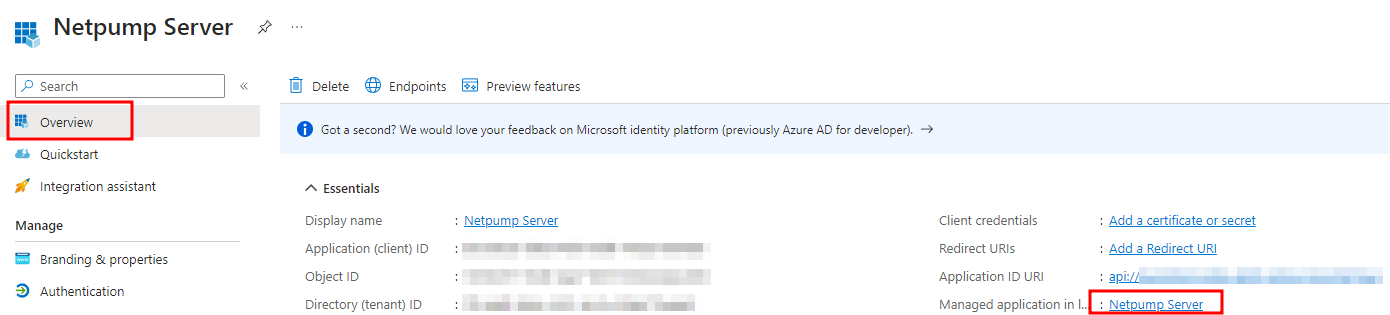
-
Click
Properties -
Set
Assignment RequiredtoYes
-
Save -
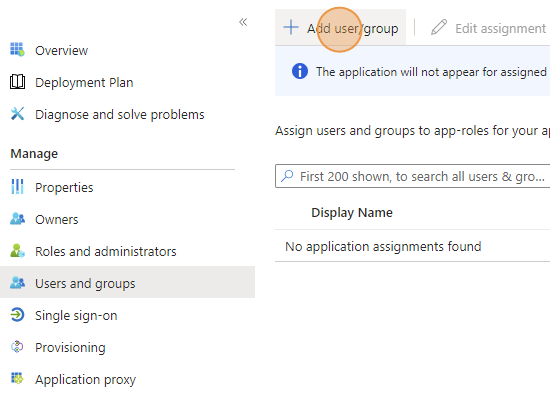
Click
Users and groups -
Add all users who require access to configure or use the Netpump service
Key Vault - Service Principal permissions
ℹ️ Note: As a prerequisite, you need a Key Vault with a valid SSL certificate for the domain you want to host your Netpump server on. The steps below cover giving your app registration (service principal) access to that Key Vault.
-
Open your Key Vault resource in Azure Portal and click on
Access control (IAM) -
Click on
Add>Add role assignment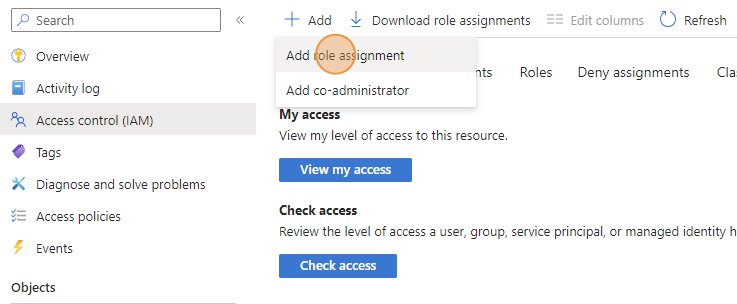
-
Select the
Key Vault Secrets Userrole then clickNext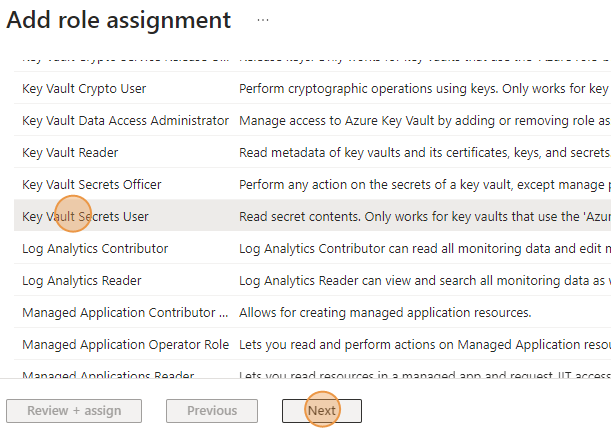
- Click
Select membersthen search forNetpump Serverℹ️ Note: The name will depend what name you gave the application in the
App Registration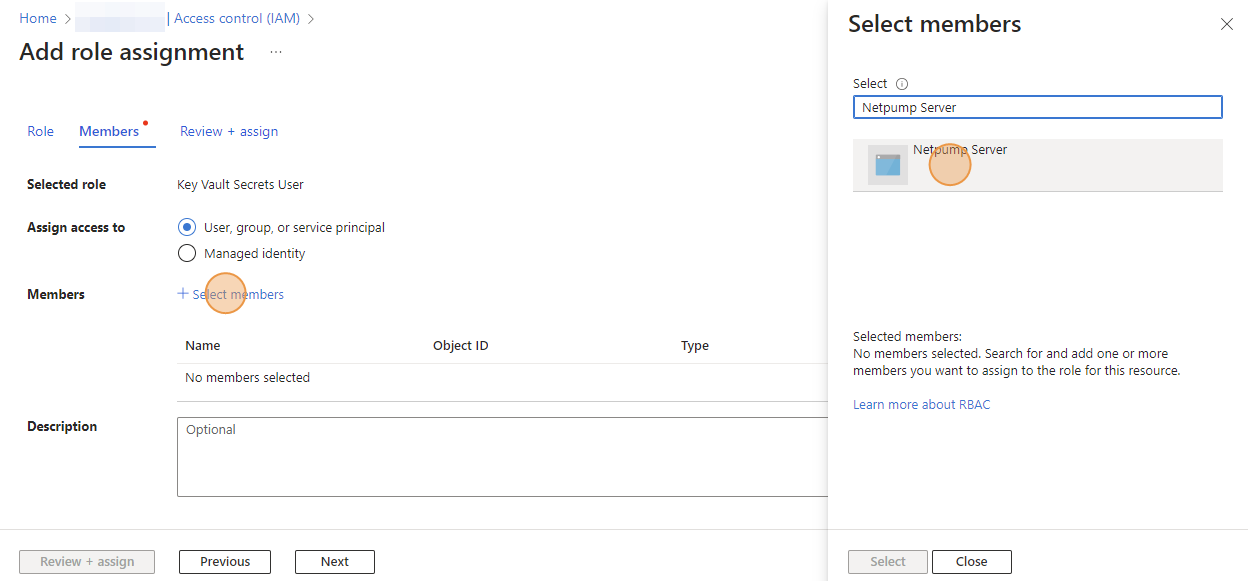
-
Click
Select -
Click
Next -
Confirm the details and click
Review + assign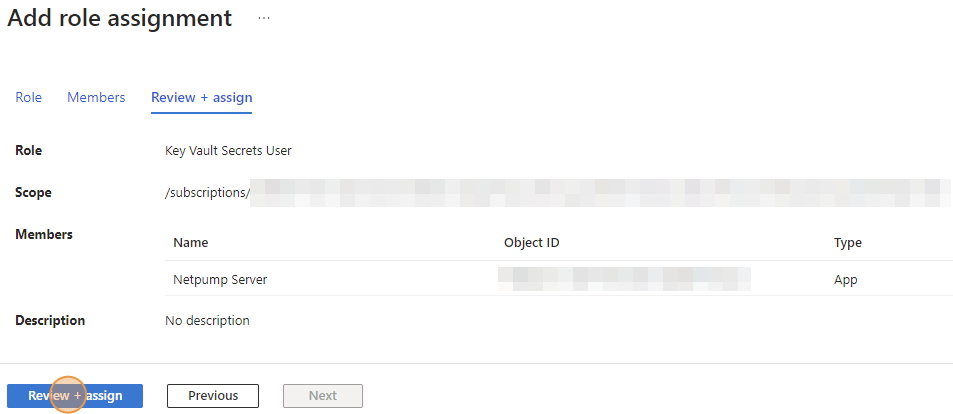
Ready to provision cluster
You are now ready to provision your Netpump server cluster.